Pleasing to remind you of our new line of Register clothing which is available via the website.
Going like hot cakes, I gather. There’s a few examples of what’s on offer in the image below, might be worth, might be worth dropping a few hints, what with Christmas not far away now! Ho ho ho!!!
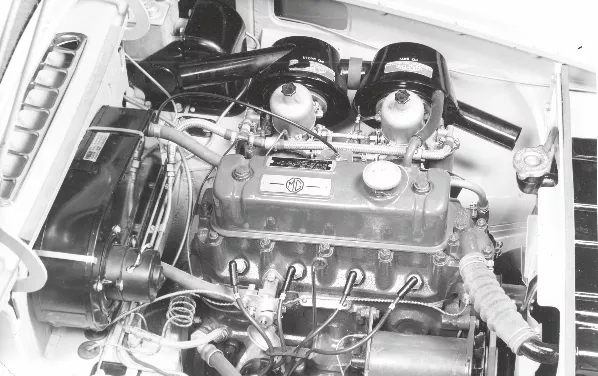
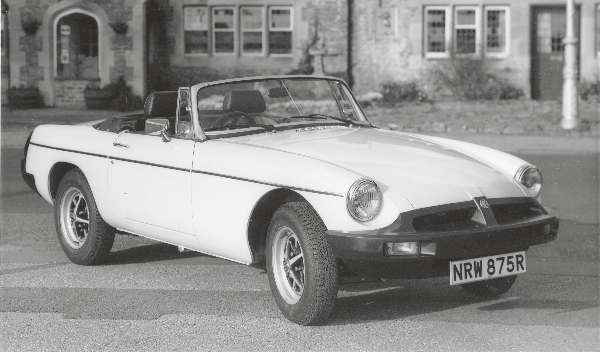
I got this set of offerings below from Peter Cope, which we’ve illustrated with some original archive photos. Thanks, Peter.
Hopefully, they will get people thinking and sending in their own thoughts. The more the merrier! The other technical item comers from our technical guru Graham Dix. Thank you, Graham…much appreciated.
regalia.mgb-register.org / clothing.mgb-register.org
Peter’s Pointers
I have just been reading the fuel gauge calibration notes in the recent MGB newsletter. So it got me thinking. I started typing the following tips up for the Safety Fast! Tech Tips page, and then realised that they might be more suited to the MGB Register newsletter.
Please note that if you are not technically qualified you should let a properly trained technician or electrician do these modifications for you. I have no mechanical ability at all, so appointed myself parts and catering manager!
1. MGBs were designed to run on 100 octane petrol. Period manuals from BMC/Leyland make this clear. So, I always run my Bs (and my modern car) on Shell V Power and I add Miller’s VSP to further boost the octane rating as well as provide protection against Ethanol. They run much better as a result. I always try to stick to one brand and I try not to use supermarket petrol whatever its octane. I have had totally contrary advice about this from Henry Cole who, years ago, was the Register Scribe, ex Esso man, who swears by Tesco Momentum fuel as it has no additives and is, therefore, closer in character to what we had to use in the far-off, halcyon days when our cars were young and we all had more hair!!….just saying…that’ll put the cat among the pigeons.
2. If the oil pressure takes a time to rise on a three-bearing engine when you start it then just turn the engine over a few times without pulling out the choke until you see the pressure needle rising up. Mine always takes a time to rise but it doesn’t seem to have done any damage over 20-plus years.
3. You can charge the B batteries in an early car or jump start it without having to remove those irritating panels behind the seats. Under the bonnet, connect one charger crocodile clip to earth, say the dynamo bracket, and the other (make sure you get them the right way round, positive or negative earth!) to the engine end of the cable from the batteries which is bolted under a rubber cover on the starter solenoid.
Make sure you put the rubber boot back afterwards!
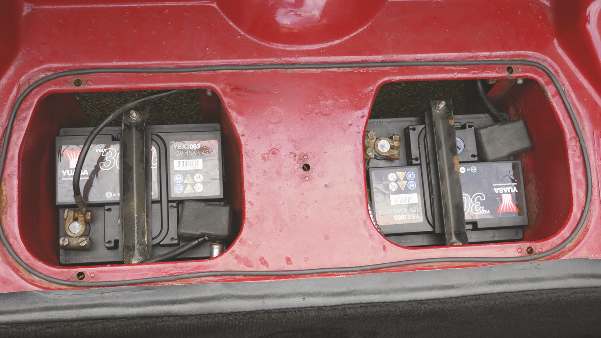
4. You can replace the twin 6-volt batteries with a pair of 12-volt batteries rewired in parallel. This is quite simple to do and then you double the amperage turning the engine over. I fitted the largest that would go in the cradles, although it required cutting off the flanges on the bottom of the cases and redesigning the retaining brackets to go over the batteries as seen in the photos. I added tough terminal covers as well, as an added safety measure.
5. If the car starts normally when cold but will not when the engine is very hot (say after stopping to fill up with petrol) check that the HT leads are sound. This happened to me and after changing everything else only the HT leads were left. The fault was in the main HT lead from the coil which I think had a break. This didn’t matter when the engine was cold but when it got really hot I suspect that the casing expanded and created a gap in the cable. On another occasion a persistent hesitation at about 1800rpm also proved to be the HT leads. It’s not always the rotor arm or condenser at fault.
6. If there is a loud banging at times from the rear of your GT it may well be the tailgate. Over time the rubber seal which also acts to tension the lock loses its strength, allowing the tailgate to move when driving over rough roads. I first wrapped insulation tape around the latch but it soon wears out and the banging starts again. I finally solved the problem by slitting a short length of radiator overflow rubber pipe lengthways and putting it over one bottom corner of the aperture flange (putting one each side proved too much tension and the lid wouldn’t shut). This acts as an additional tensioner and the banging stops!
7. Late (rubber bumper) Bs have the fittings for the second cooling fan which was not just fitted to the V8 but also to the American specification four-cylinder cars. I was able to buy a fan and all the brackets from a well-known supplier and it is relatively simple to fit. The workshop manual shows how the American cars were wired up. I also fitted a switch on the dashboard wired up to bypass the radiator thermostatic switch so that I can turn the twin fans on before the engine temperature starts to get too high, say at traffic lights or in a queue.
8. If the car sometimes hesitates or refuses to start or just dies on you when going along, check the low-tension cable inside the distributor. I had this happen on a 1300 and the wires in the cable, which are very fine, had simply disintegrated over forty years. This fault was the very devil to locate as you need the car to be stationary when it won’t start. Even then you can’t see inside the distributor of course. I would recommend checking and even changing the cable as a routine service item every few years. I now carry a spare in the boot.
9. Over time, verdigris builds up inside the ignition switch and can result in the engine just stopping for no apparent reason whilst on the road. It’s not a pleasant experience in the middle of a busy junction. I speak from experience! Remove the switch and leave it sunk in WD40 for as long as possible. Afterwards lots of crud (a technical term known to all MG owners, of course) will come out and the switch, after drying it, should now work properly. If the switch can’t be removed (say on a steering column lock) just keep spraying WD40 into it. There will be lots of drips so put something to catch them on the floor.
10. The late MGB floats are irritatingly inaccessible underneath the carbs. So every time any crud (that technical term again) works its way into the carbs it is a real nuisance to take everything to bits to clean out the float chambers. I added a second fuel filter in the flexible fuel pipe just in front of the front carb to catch any rubbish that makes it that far. It is very important to be very careful positioning it to avoid the bonnet support as it comes down there when the bonnet is closed.
Peter Cope
FLYWHEEL WOES – 1967 MGB
If from time to time I have left my B for more than a couple of months without starting her up, I always have the annoying situation whereby I cannot select a gear because the clutch plate has ‘welded’ itself to the flywheel.
I’m sure this has happened to many of us over time and there is more than one solution. The most common is to bump start in gear and then ‘blip’ the throttle whilst disengaging the clutch. I have tried this and it works fine IF you have assistance, but invariably I don’t. Another solution I have now practised many times is to run the engine until both the engine and gearbox are thoroughly warm, usually about 30 minutes at tick over. Only then do I depress the clutch and ‘blip’ the throttle before engaging a gear. This has worked for me every time but is still frustrating, and thus I have been wanting to replace the clutch plate for some time in the hope that a new one would be less inclined to stick.
The opportunity arose recently due to another set of unfortunate events. My starter motor jammed. No problem, use the age-old method of hitting it with a hammer. It worked – the first time. A couple of weeks later, it jammed again. No amount of hammering would shift it, nor rocking the car backwards and forwards in gear. It was jammed solid. This time it was a trailer ride home for an engine out session.
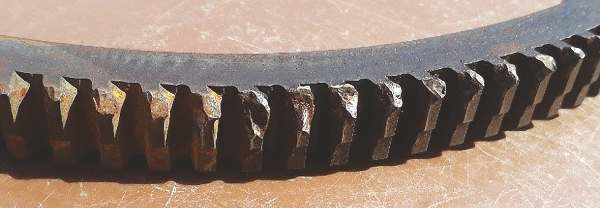
Once the engine was out of the car the problem was obvious. The starter ring was very badly mauled in a couple of places (see photo). The ring is an interference fit on the flywheel, so either has to be heated to a temperature far higher than I could achieve at home or drilled through the ring to weaken the ring before ‘breaking’ it with a Hammer and cold chisel. This it did and I then
had Richard at Manor Garage, Wantage, fit the new ring for me.
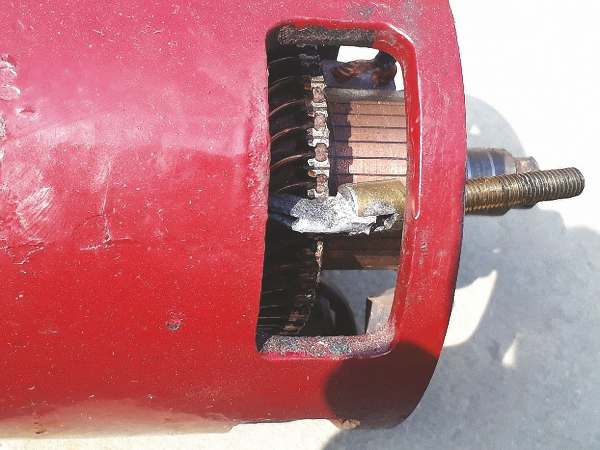
The starter motor had wear on the shaft and the spring return on the inertia drive was failing to return properly. Both issues I considered were the main cause of the motor jamming in the first place. I took it apart, ever optimistic that I could repair it, only to find that the power terminal that is soldered to the windings had a dry joint and came apart in my hands when I removed the rear end plate of the motor. This surprised me, as the motor was definitely well and truly jammed into the starterring and wasn’t just failing to turn over. A future cause of a failure to start, I suspect. I took the decision to order a refurbished replacement starter motor, along with a new clutch assembly.
Using a cheap clutch alignment tool from eBay I fitted the new clutch assembly. Once all was back together, I craned the engine back into the engine bay using a tilt attachment (from eBay) that made aligning the engine and gearbox considerably easier than past experiences. Now reconnected to the gearbox, all seems absolutely fine.
I’m not planning on leaving the car a couple of months between start-ups so hopefully will never know if the new clutch plate will weld itself to the flywheel. We will see. I also had issues with the clutch thrust bearing, but that is another story.
Graham Dix
DAVID BROADHURST
newsletter-editor@mgb-register.org


