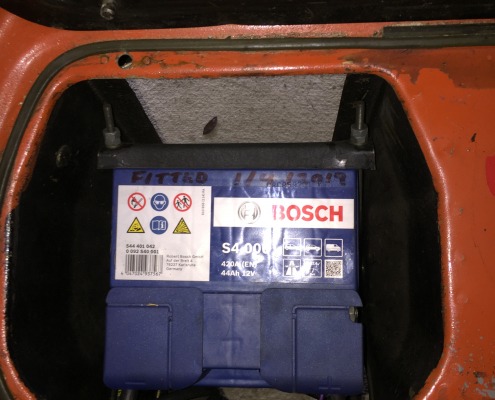
Fitting a 12 volt battery to a chrome bumper MGB
Mention the word Batteries to a MGB owner and the term ‘out of sight, out of mind” comes to hand.
The MGB batteries are located behind the seats and tend to get neglected due to the effort required to access them.
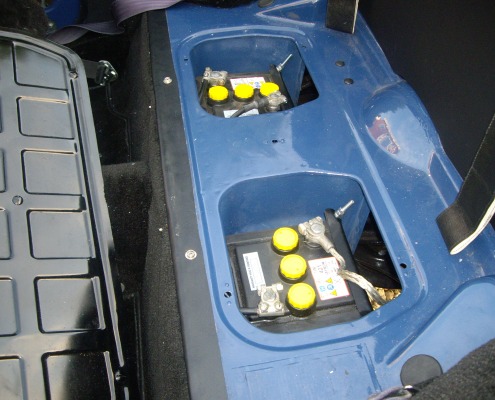
The MGB, when launched was originally fitted with two 6 volt batteries mounted behind the seats in separate carriers either side of the transmission tunnel. (A design carry over from the MGA)
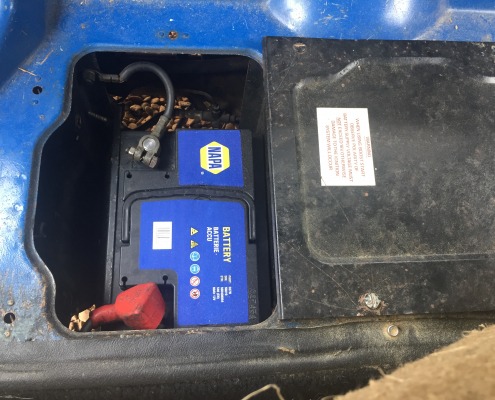
With the launch of the rubber bumper cars, MG modified the right hand battery compartment to accommodate a single modern type 079 12 volt battery. At the same time altering the battery cover and blanking off the left hand battery compartment.
So why fit a 12 Battery to Chrome Bumper Cars?
- The original 6 volt batteries used an old fashioned wet plate design requiring a mixture of sulfuric acid and distilled water.
- They require regular topping up which is quite often overlooked, and leads to premature failure.
- They weep around the fill points, leading to corrosion of the battery terminals.
- They are expensive, approximately £90 each (x2) compared to a suitable 12V battery at around £60.
- The 12 v battery will give a significant improvement in CCA (cold cranking current) and starting.
- The left hand battery compartment can be converted to a useful storage for spares or tools.
- Simple and straight forward to fit (1Hour)
12 volt Battery choice
When choosing a suitable battery there are two factors to consider. The battery capacity (AH) and the CCA, the cold cranking current.
An electrical system of a standard MGB is rudimentary, it is not packed with modern car electronics or current consuming items like electric windows, seats or air con. With most of us only using our car during fine weather the need for a large capacity battery to support the rigors of winter driving (lights, wipers and in the case of the GT the HRW) is not necessary. What is important is the Cold cranking current (CCA). This is the amount of current a battery can supply when turning the engine over on the starter and is important as the B can be hard to crank and start.
So to choice. Firstly the battery fitted to the later rubber bumper cars (Type 079) will not fit into a chrome bumper battery compartment. There are 3 commonly available batteries types (063, B036 and 202) that will fit as direct replacements and offer significantly improved CCA over the 6V batteries.
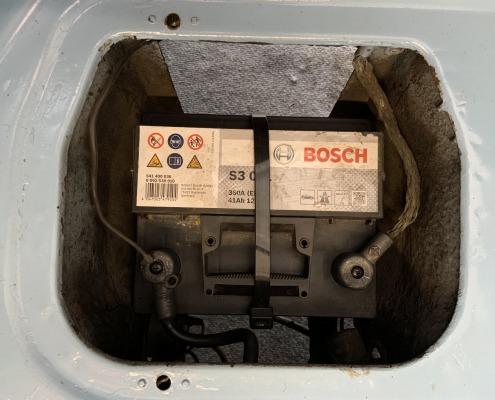
The type 063 will fit into the right hand battery compartment. It is a bit of a squeeze but will fit and can be secured using large cable ties.
Two other alternatives are the B036 and more commonly available type 202. Both batteries are the same size as a single 6V battery and can be fitted and secured using the existing battery clamp.
Fitting a 12V battery into a MGB
Fitting a B36 or 202 battery is the simplest and should only take around one hour to fit. It just involves removing the 6 V batteries, fitting the new one and relocating the earth lead from the left hand battery compartment. I have made no reference to Positive or negative terminals as MGB’s started life as positive earth, then around 1968 changed to negative earth. As a rough guide if your car has a dynamo its positive earth. If it has an alternator it is probably Negative earth.
Good access will make the job easier. Move the seats as far forward as they will go. In the case of the GT remove the rear seat cover. On the roadster remove the carpet and releasing the rear of the roof and pulling it forward will improve access.
- Remove the battery cover by releasing the 5 x Zeus fasteners.
- Disconnect the earth lead from the battery terminal in the left hand battery compartment. Then disconnect the leads from the other 3 battery terminals.
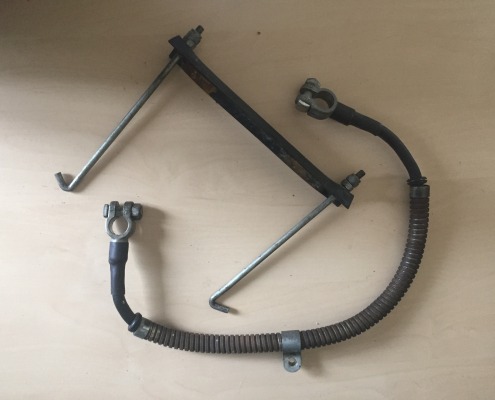
- Using a 7/16 spanner, undo the nuts securing the battery clamps sufficient to enable the battery clamps to be unhooked and removed from both battery compartments.
- Remove both 6V batteries.
- Carry out any remedial work to clean up the battery compartments. Remove the rubber battery pads from the left hand battery compartment.
- You now have a choice. Either remove the Battery to battery lead that connects between the battery compartments. It is held in place with a single P clip up in the rear of the transmission tunnel. Putting the car on ramps will give sufficient access. Alternatively it can be just left in place.
- Unbolt and remove the earth lead from the left hand battery compartment. This will need to be relocated to the right hand battery compartment.
- Depending on the year of car you may find a suitable hole in the right hand battery compartment. If not you will need to drill a 5/16th (8mm) hole in a suitably position to enable the earth lead to connect to the new battery terminal. I would suggest temporarily fitting the new 12V battery, attaching the earth lead and marking a suitable position for the hole in the heelboard.
Note: The battery should fit with the terminals facing the heelboard.
- Once you have drilled the hole, use a piece of emery paper to remove any paint around the hole to ensure a good connection of the ground lead. Use the original fixing nut and bolt to secure the earth lead in the right hand battery compartment. Add a little Vaseline to coat the bolt to protect from corrosion.
- Fit the new 12 V battery, terminals facing the heelboard.
- Fit one set of the 6 V battery clamps, Ensuring they hook into holes either side of the battery compartment, then tighten the nuts to secure the battery.
- Fit the live feed from the starter motor to the battery followed by the earth lead.
- Secure the battery cover back in place with the 5 x Zeus fasteners , refit the carpet/ seat cover
- Job done.

